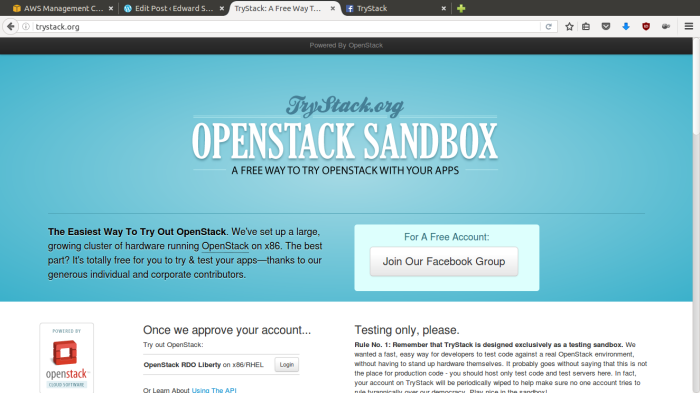
OpenStack is an open-source software cloud computing platform. OpenStack is primarily used for deploying an infrastructure as a service (IaaS) solution like Amazon Web Service (AWS). In other words, you can make your own AWS by using OpenStack. If you want to try out OpenStack, TryStack is the easiest and free way to do it.
In order to try OpenStack in TryStack, you must register yourself by joining TryStack Facebook Group. The acceptance of group needs a couple days because it’s approved manually. After you have been accepted in the TryStack Group, you can log in TryStack.
I assume that you already join to the Facebook Group and login to the dashboard. After you log in to the TryStack, you will see the Compute Dashboard like:
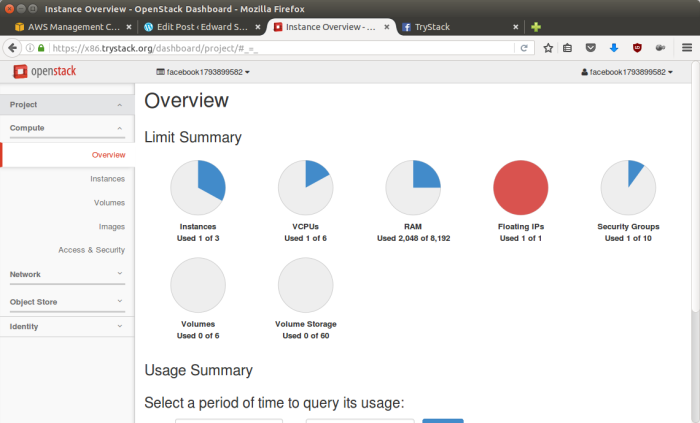
OpenStack Compute Dashboard
Overview: What we will do?
In this post, I will show you how to run an OpenStack instance. The instance will be accessible through the internet (have a public IP address). The final topology will like:
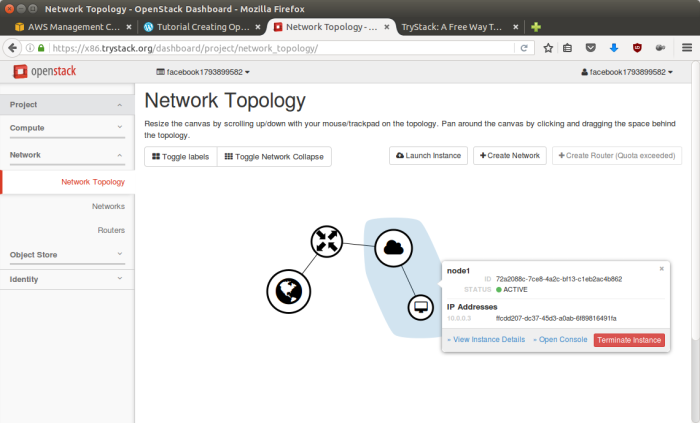
As you see from the image above, the instance will be connected to a local network and the local network will be connected to internet.
Step 1: Create Network
Network? Yes, the network in here is our own local network. So, your instances will be not mixed up with the others. You can imagine this as your own LAN (Local Area Network) in the cloud.
- Go to Network > Networks and then click Create Network.
- In Network tab, fill Network Name for example
internaland then click Next. - In Subnet tab,
- Fill Network Address with appropriate CIDR, for example
192.168.1.0/24. Use private network CIDR block as the best practice. - Select IP Version with appropriate IP version, in this case
IPv4. - Click Next.
- Fill Network Address with appropriate CIDR, for example
- In Subnet Details tab, fill DNS Name Servers with 8.8.8.8 (Google DNS) and then click Create.
Step 2: Create Instance
Now, we will create an instance. The instance is a virtual machine in the cloud, like AWS EC2. You need the instance to connect to the network that we just created in the previous step.
- Go to Compute > Instances and then click Launch Instance.
- In Details tab,
- Fill Instance Name, for example
Ubuntu 1. - Select Flavor, for example
m1.medium. - Fill Instance Count with 1.
- Select Instance Boot Source with Boot from Image.
- Select Image Name with Ubuntu 14.04 amd64 (243.7 MB) if you want install Ubuntu 14.04 in your virtual machine.
- Fill Instance Name, for example
- In Access & Security tab,
- Click [+] button of Key Pair to import key pair. This key pair is a public and private key that we will use to connect to the instance from our machine.
- In Import Key Pair dialog,
- Fill Key Pair Name with your machine name (for example Edward-Key).
- Fill Public Key with your SSH public key (usually is in ~/.ssh/id_rsa.pub). See description in Import Key Pair dialog box for more information. If you are using Windows, you can use Puttygen to generate key pair.
- Click Import key pair.
- In Security Groups, mark/check default.
- In Networking tab,
- In Selected Networks, select network that have been created in Step 1, for example
internal.
- In Selected Networks, select network that have been created in Step 1, for example
- Click Launch.
- If you want to create multiple instances, you can repeat step 1-5. I created one more instance with instance name
Ubuntu 2.
Step 3: Create Router
I guess you already know what router is. In the step 1, we created our network, but it is isolated. It doesn’t connect to the internet. To make our network has an internet connection, we need a router that running as the gateway to the internet.
- Go to Network > Routers and then click Create Router.
- Fill Router Name for example
router1and then click Create router. - Click on your router name link, for example
router1, Router Details page. - Click Set Gateway button in upper right:
- Select External networks with external.
- Then OK.
- Click Add Interface button.
- Select Subnet with the network that you have been created in Step 1.
- Click Add interface.
- Go to Network > Network Topology. You will see the network topology. In the example, there are two network, i.e. external and internal, those are bridged by a router. There are instances those are joined to internal network.
Step 4: Configure Floating IP Address
Floating IP address is public IP address. It makes your instance is accessible from the internet. When you launch your instance, the instance will have a private network IP, but no public IP. In OpenStack, the public IPs is collected in a pool and managed by admin (in our case is TryStack). You need to request a public (floating) IP address to be assigned to your instance.
- Go to Compute > Instance.
- In one of your instances, click More > Associate Floating IP.
- In IP Address, click Plus [+].
- Select Pool to external and then click Allocate IP.
- Click Associate.
- Now you will get a public IP, e.g. 8.21.28.120, for your instance.
Step 5: Configure Access & Security
OpenStack has a feature like a firewall. It can whitelist/blacklist your in/out connection. It is called Security Group.
- Go to Compute > Access & Security and then open Security Groups tab.
- In default row, click Manage Rules.
- Click Add Rule, choose ALL ICMP rule to enable ping into your instance, and then click Add.
- Click Add Rule, choose HTTP rule to open HTTP port (port 80), and then click Add.
- Click Add Rule, choose SSH rule to open SSH port (port 22), and then click Add.
- You can open other ports by creating new rules.
Step 6: SSH to Your Instance
Now, you can SSH your instances to the floating IP address that you got in the step 4. If you are using Ubuntu image, the SSH user will be ubuntu.

you are skipping to add set gateway option in your tutorial.
LikeLike
Oya, I missed it. I have added the set gateway option. Thank you.
LikeLike
Thanks for the post Edward !. Following this post i have created an instance successfully but while starting the instance i’m getting this error “:Error: You are not allowed to start instance: ” , also snapshot creation is also failing . I would really appreciate any help !
LikeLike
Hi Mitali, last time I also got the same issue. I did nothing and just came back later. I don’t know why that was happened. You can ask for help in the TryStack Facebook Group (https://www.facebook.com/groups/269238013145112/) instead.
LikeLike
Hello, I created a CentOS7 instance, but I do not have the username and password to login. Where do I get login credentials?
LikeLike
Hi Jerry, for the CentOS 7, the default username is
centos. In the cloud, usually, we do not use a password to login to the cloud instance. We use SSH-based authentication.In the Step 2: Create Instance, you should enter your public SSH key in the Access & Security tab. To login to your CentOS instance, just run:
LikeLike
I did that and it still doesn’t work:
ssh -i cloudkey.pem ubuntu@8.43.86.67
Permission denied (publickey).
LikeLike
Have you tried with
centosuser?ssh -i cloudkey.pem centos@8.43.86.67CentOS has different default user name than Ubuntu.
LikeLike
I’m one of the Trystack operators. Thanks for putting this together – great guide.
LikeLike
Hi, glad to share this guide. Hopefully, this will help others to try OpenStack in TryStack.
LikeLiked by 1 person
Hello,
Many thanks for the steps. I tried this and am stuck at associating the floating IP with the instance.
Create Router interface has changed from what you mention.
Now, when I try to associate the floating IP, it pops up a dialog where it says Port to be associated -> No ports available.
Suggestions?
LikeLike
I managed to get past this. I had to create an interface inside the router.
LikeLike
Thank a Lot! helped me lot
LikeLike
I am installing ubuntu instance but it ask for login and password.
what is the default login and password of ubuntu.
It also shows message unable to import public key. I am using puttygen to generate public key.
LikeLike
hi,
Where do i get network address for step 1 from trystack?
LikeLike
Please help!!!!
Cant find the tryStack facebook group.
Any other way to log in?
LikeLike